73D41416194E8A7C390936971FB2B74B Chira Sathi: Hacking
Showing posts with label Hacking. Show all posts

Friday, September 30, 2011

Top Ways How Hackers Can Hack Facebook In 2011

Facebook is one of the most widely used social networking site with more than 750 million users, as a reason if which it has become the number 1 target of hackers, I have written a couple of post related to facebook hacking here at wildhacker, But some of the methods of hacking facebook are not working now days, So in this article I am sharing top methods on how hackers can hack facebook accounts in 2011


hack facebook

Don’t forget to Subscribe to our RSS feed


So here are the top methods which have been the most popular in 2011:

1 : Facebook Phishing / Tabnabbing (New Phishing Method )

Tabnabbing is a modern type of phishing method used to hack websites passwords. As we all know normal Phishing attack is easily detectable on many site such as Facebook,Gmail, yahoo etc.

hack facebook

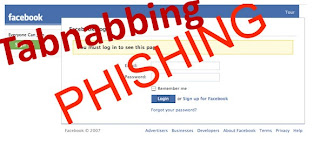
Like Facebook has implemented an extra code that validates the previous arriving URL and some basic functions. If it founds that page from which you arrived is a Facebook Phish or fake page, it displays a warning message to user that You have been arrived from fraudulent or fake page. So please change you Facebook account password immediately. So Victim easily came to know that was made fool by someone and he changes his account password again.

I have explained the step by step Tabnabbing ( New phishing ) process in my post below:

How To Hack Facebook Password Using Tabnabbing

2 : Keylogging

Keylogging, according to me is the easiest way to hack a facebook password, Keylogging sometimes can be so dangerous that even a person with good knowledge of computers can fall for it. A keylogger is basically a small program which once is installed on victims computer will record every thing which victim types on his/her computer. The logs are then send back to the attacker by either FTP or directly to hackers email address.

I have Shared two such FUD Keylogger on Wildhacker, which are as follows,

hack facebook

For more information visit Winspy Keylogger

For more information visit Sniperspy Keylogger for Windows

For more information visit Sniperspy Keylogger for MAC

3 : Stealers

Almost 80% percent people use stored passwords in their browser to access the facebook, This is is quite convenient but can sometimes be extremely dangerous, Stealers are software's specially designed to capture the saved passwords stored in the victims browser, Stealers once FUD can be extremely powerful. I have already explained about RATs and keyloggers to hack email account passwords, where you have to send your keylogged file to victim. In the same way, Istealer can be used to hack email account password and find passwords of various emails. I have provided link for software download...

hack facebook

I have explained the step by step IStealer process in my post below:

How To Hack Facebook Password Using IStealers

4 : RAT(Remote Administration Tool)

hack facebook

A RAT is also a shortcut called Remote Administrator Tool. It is mostly used for malicious purposes, such as controlling PC’s, stealing victims data, deleting or editing some files. You can only infect someone by sending him file called Server and they need to click it. By using this Rats we can easily hack email account passwords.

I have explained two RATS on Wildhacker,

DarkComet

CyberGate Rat

For basic Guide and FAQ about RAT click here

5 : Mobile Phone Hacking

hack facebook

Millions of Facebook users access Facebook through their mobile phones. In case the hacker can gain access to the victims mobile phone then he can probably gain access to his/her Facebook account. Their are lots of Mobile Spying softwares used to monitor a Cellphone.

The most popular Mobile Phone Spying softwares is:

Mobile Spy

6 : USB Hacking

hack facebook

If an attacker has physical access to your computer, he could just insert a USB programmed with a function to automatically extract saved passwords in the browser, I have also posted related to this attack which you can read by accessing the link below:

Usb password stealer To Hack Facebook Passwords

Facebook Hacking Course

hack facebook

Facebook hacking course is a facebook security course created by Rafay Baloch, which tells you exactly how how hackers can compromise your facebook accounts and what can you do to protect your facebook accounts from getting hacked.

Click here to get access to the course

So friends, I hope you have enjoyed reading the aricle.if you have any doubts about any one of the above trick of hacking facebook, please mention it in comments.

Enjoy HaCkInG...

Sunday, September 25, 2011

How To Change File Extension

Hello Guys..On wildhacker I have written about Keylogger and Crypter in my previous articles. Today in this tutorial I will show you how to make your .exe (or .com/.scr) files look like .jpeg/.mp3 or any other filetype! By normally changing the extension to e.g .mp3, will corrupt your file, but with this exploit your file will still be executable!

So for example lets say, you have created a file server.exe using keylogger, but I want it to look like a mp3 file, so people would run it. In this case, you should change the .exe to .scr to make it look more legit in the end.


Follow the steps bellow to change the file extension..

Step 1: lets say we have server.exe, now, rename your server.scr (which is still executable) to "songname uploaded by .SCR" (notice the space).


Step 2: Now it's time to use the exploit! Open up the Character Map,


Step 3: Scroll down and find the "U+202E: Right-To-Left Override" character in Character Map,


Click "Select" and then "Copy".

Step 4: Now choose to rename your file, and paste the copied character right before the ".SCR" (press ctrl+v to paste)


Step 5: hen type "3pm" (without the " ") and press Enter. Now it should look like this:
Spoiler,


Done! Obviously you might want to change the icon to look like an mp3 before doing this..

Most browsers have patched this, but it can be used on IM's like MSN or Yahoo Messenger. To upload the file to a filehost, you need to make a .rar file with your server inside.


Now go ahead and mix around with .exe/.scr/.com and the fake-extensions to find some other legit-looking combinations!

So friends, I hope this file extension changing tutorial will be useful for you. If you have any problem in this file extension changing tutorial, please mention it in comments bellow.

Enjoy HaCkInG.........

Thursday, April 14, 2011

Change the Title of Yahoo Messenger


Here’s how you change the title text that appears at the top of the Messenger window. By default, this is “Yahoo! Messenger”, followed by your status. Simply edit the ymsgr.ini file, which you will find in the same folder as the Messenger program, in your Program Files folder. Locate the file and open it in Notepad. Then, at the end, add the following:
[APP TITLE]
caption=YOUR TEXT
Here, “YOUR TEXT” is whatever you want in the title bar. Save the file and close Messenger. When you restart it you will see your text in the title bar.

Hacking Yahoo Messenger


This tutorial will tell you how to hack yahoo messenger while you are engaged in chatting with some person. While you are chatting through yahoo messenger, Yahoo will hide the IP addresses of all the computers that are connected through the yahoo messenger application to the chat room. So it is not possible to directly find out the IP of the person you want to hack. Then how to get the IP address? Yes it is still possible to hack the IP address during the Yahoo messenger chat. The procedure to Hack Yahoo messenger is discussed in detail below.
While you are chatting via yahoo messenger the communication between you and the person you want to hack, takes place indirectly via Yahoo server and not directly. It is not possible to hack Yahoo messenger directly to get the IP address. So to hack his IP, you must establish a direct communication with him. So ,how to do this? It’s easy. Just start chatting with some one via Yahoo messenger. During the process of chatting send him a big file. Now the file transfer takes place directly between your computer and the victim’s computer(via yahoo messenger application). So now, you are ready to go. Here’s the step-by-step process to hack Yahoo messenger and get the IP address of the person .
  • Goto the COMMAND PROMPT (START>>>RUN>>>Type CMD).
  • Here Type “netstat -n” (without quotes).
NOTE: If you are new to “netstat” and other IP related commands refer this tutorial: Windows XP IP Utilities
  • The pic given below shows netstat results of my computer. I was not chatting when i took this pic and hence it looks modified.
  • Here local address is your own IP and the foreign address is the IP address of the recipient with whom you are connected via yahoo messenger (There may be multiple recipients and hence multiple foreign addresses).
  • Now send him the file.
  • Check the output by typing the command “netstat -n” (without quotes).
  • Assume the output is something like this.
TCP 127.0.0.10:5101 124.55.23.11:1246 ESTABLISHED
 
Here 124.55.23.11 is the IP address of the person with whom you are chatting and 1246 is the port number where connection is established. That’s It! You have now hacked Yahoo messenger to get his IP address.
Once you hack Yahoo messenger and get his IP address you can use any of the Remote Administration tools or perform NETBIOS HACKING.
NOTE: Some times there are chances where in the file transfer gets encrypted (takes place via yahoo server itself). So in this case the above hack may fail to work.

Chat without Yahoo Messenger or Gtalk

Can we chat without Yahoo messenger? Most of us are familiar with the most widely used applications such as Yahoo messenger and Gtalk to carry out chatting with our friends. But here I’ll show how to chat without Yahoo messenger or Gtalk. As we all know the information we exchange with their servers(Yahoo or Gtalk) are recorded and stored along with the corresponding IP addresses. This may hurt our privacy since all the information we exchange while chatting has to pass through a third party server.
Moreover if the matter is highly confidential, then it is necessary to have a totally private chat where the messages are exchanged only between the people involved in the chat and not with any other third party servers. At these situations, it is better to chat without Yahoo messenger.
 
So, how to carry out a private chat without Yahoo messenger or Gtalk?
For this purpose there exists many softwares that support’s you to host a web-based chat system without any additional software or services. So with these softwares the exchange of messages takes place directly between the two persons engaging in the chat and will not pass through any other third party server. This ensures 100% privacy and eliminates the desperate need to chat with Yahoo messenger.
 
One of my favorite program for private chat is Easy Chat Server
 
Easy Chat Server is a Windows program that allows you to host a web-based chat system without any additional software or services. Unlike other chat server, you do not need to install Java. It allows you to build one or more web-based chat rooms on your machine, and provides advanced chat functionalities aiming to offer discussion space for your users, customers and partners.
Here are some of the screenshots of Easy Chat Server.


Key Features of Easy Chat Server:
  • Easy to use, Simple installation that will have you up and running in minutes.
  • 128-Bit Security Socket Layer(SSL) support. Support for server level certificate creation.
  • Instantly runs a complete chat server on your PCs – does not need to install any Web Server.
  • Supports full private messaging and One to One private chat.
  • Support of images, smileys, avatar icons.
  • Full chat and access logs are available within the chat server.
  • Have a built-in IP Filter, supports banning/unbanning IP address, securely.
  • Multiple styles available for the user to customize rooms.
  • Unlimited rooms and users, no any annual, per-user, or maintenance fees.
  • No spyware, adware or other unwanted extra programs.

How to Save Bookmarks in IE, Firefox, Chrome and Opera


Save BookmarksHow would you like to save your bookmarks in IE, Firefox, Opera and Google Chrome so that you can restore them in case if you need to re-install your operating system or move them from one computer to another? This post will show you how to save and restore bookmarks in simple steps.
Bookmarking the favorite web pages can save a lot of time as it becomes almost impossible to remember a list of favorite websites and their URLs. However it can be really frustrating at times when you lose all those saved bookmarks in case if a computer crashes. Also if you are a person who uses more than one computer then it becomes hard to copy all those saved bookmarks one by one manually. So saving the bookmarks can become handy in such situations. Here is how to to do it.
 

Saving a Bookmark file in Internet Explorer

1. From the File menu, select the option Import and Export.
2. Select the option Export to a file and click on Next.
3. In the next screen select Favorites and click on Next.
4. In the next screen again click on Favorites and click on Next.
5. Now choose the destination where you want to save your bookmarks and click on Export.
6. In the next screen click on Finish.
Now you have successfully saved all your bookmarks in a .HTM file. You can use this file to later restore the bookmarks to either IE, Firefox or any other browser. To import the saved bookmarks from a file all you need to do is goto File menu, click on Import and Export, select the option Import from a file and proceed with the screen instructions.
 

Saving a Bookmark file in Firefox

1. From the Bookmarks menu on the top select the option Organize Bookmarks.
2. A window will pop-up. From the window click on Import and Backup at the top and select the option Export HTML.
3. Now choose the destination where you want to save the bookmark file and click on Save.
To restore this saved file, follow the step-1 and in step-2 select the option Import HTML instead of Export HTML and proceed.
 

Saving a Bookmark file in Google Chrome

1. From the Tools menu, select Bookmark Manager.
2. Click the Organize menu in the manager.
3. Select Export bookmarks.
4. Select the location where you want your exported file to be saved, then click Save.
To restore the bookmarks, follow step-1, step-2 and in step-3 select Import bookmarks instead of Export bookmarks and proceed.
 

Saving a Bookmark file in Opera

1. From the File menu, select the option Import and Export.
2. Scroll over to the pull-down menu on the right and choose Export Bookmarks as HTML.
3. On the next screen, choose the destination folder from the Save in menu text box at the top of the screen.
4. Just click the Save button and you’re done.

Customize Google to Improve Search Results


Customize GoogleGoogle is indisputedbly the best search engine out there on the Internet, however there are a few ways by which you can customize Google and make it even better. I have got 3 best free Firefox extensions using which you can customize Google by adding extra useful information to your search results and remove unwanted informationlike ads, spam and click tracking so as to improve the overall searching experience. The following are the 3 best extensions for Firefox using which you can improve the search results.
 

1. OptimizeGoogle:

 
Using OptimizeGoogle, you can get rid of text ads from Google search results, add links from about 10 other search engines, add position counter, product results and more. You can even filter your search results to see dead websites (using WayBack Machine) and remove click tracking so that you can search anonymously. Here is a list of some of the other useful features of this plugin.
1. Use Google suggest (get word suggestion while typing)
2. Add more security by using https wherever necessary
3. Filter spammy websites from search results page
4. Option to remove SideWiki
5. Add links to bookmark your favorite result
6. Add links to other news and product search sites
To install the plugin, just visit the OptimizeGoogle page from your Firefox browser and click on the Download button. Once installed, you can enable or disable the customization options from the Tools -> OptimizeGoogle Options.
After you customize Google to improve the search results, how about adding a feature that provides a way to preview the website in the search results itself? Here is a miracle Firefox extension to this job for us.
 

2.  SearchPreview:

 
SearchPreview (formerly GooglePreview) will insert thumbnail view of the webpage into the Google search results page itself so that you can take the guess work out of clicking a link. Just install the plugin, reload Firefox and you will have the SearchPreview at work. You can install this plugin from the following link.
SearchPreview Download
OptimizeGoogle and SearchPreview have made our search results smarter and faster. Now how about safer? Well you have another Firefox plugin to make your search results safer as well. Here we go.
 

3. McAfee SiteAdvisor:

 
This is a free browser plugin that gives safety advice about websites on the search results page before you actually click on the links. After you install the SiteAdvisor plugin, you will see a small rating icon next to each search result which will alert you about suspecious/risky websites and help you find safer alternatives. These ratings are derived based on various tests conducted by McAfee.
Based on the quality of links, SiteAdvisor may display Green, Yellow, Red or Grey icon next to the search results. Green means that the link is completely safe, Yellow means that there is a minor risk, Red means a mojor risk and Grey means that the site is not yet rated. These results will guide you to Web safety.
SiteAdvisor works on both Internet Explorer and Firefox which you can download from the following link:
McAfee SiteAdvisor Download
 
I hope you enjoy these 3 plugins which make your searching experience a lot more simpler and safer. Here is a snapshot of all the 3 plugins at work.
Custom Google Search Results

Hack BSNL Broadband for Speed


If you are a BSNL broadband user, chances are that you are facing frequent DNS issues. Their DNS servers are just unresponsive. The look up takes a long duration and many times just time out. The solution? There is small hack on BSNL for this. Use third party DNS servers instead of BSNL DNS servers or run your own one like djbdns. The easiest options is to use OpenDNS. Just reconfigure your network to use the following DNS servers:
208.67.222.222
208.67.220.220
Detailed instructions specific to operating system or your BSNL modem are available in the OpenDNS website itself. After I reconfigured my BSNL modem to use the above 2 IP addresses, my DNS problems just vanished! Other ‘freebies’ that come with OpenDNS are phishing filters and automatic URL correction. Even if your service provider’s DNS servers are working fine, you can still use OpenDNS just for these two special features. After you hack BSNL DNS servers, you will see a noticeable improvement in your broadband speed.
Best Blogger Gadgets